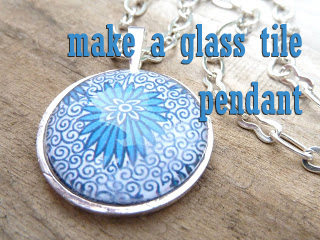
First of all here is a small shopping list of items you will need:
Images (laser prints or professionally printed images on thick smooth paper)
Glass shapes and metal trays of the same size
Craft punch (optional but makes life so much easier!)
Sealant - ModPodge is great
Glaze - Diamond Glaze, Glossy Accents or DG3 are all fab
Strong Glue - E6000 is my favourite
First, you need to choose your images - the fun part. The ones we used here are readymade 1 inch collage sheets by Piddix, Printables and Digitalya. We used a laser printer on thick smooth paper. We find cardstock might be too thick for some printers and can sometimes be textured and porous, and letter paper is far too thin, so something in between is ideal, so long as it has absolutely no texture and is completely smooth. We use a very smooth paper that is upwards of 200 or 250gsm. Some glossy coatings may run once you apply the glaze, so do not use photo paper, try instead to find a plain paper with a slight sheen but without a coating. We can only recommend laser prints for this craft - inkjet inks can often run, sometimes after several days of your pendant looking beautiful it will suddenly look all wrong. Best not to risk it and start with a good print.
(Collage sheet credit to Piddix)
Make sure that the images you will be using are thoroughly sealed with several coats of ModPodge, MicroGlaze or your favourite choice or sealant and completely dry. Depending on the inks on your prints, you may be able to skip this step, you may have to experiment. You will probably find that the laser prints and professional prints (say if you use wrapping or scrapbooking papers) will not need as much sealing as inkjet prints. Inkjet prints will need several layers of sealant before they will be usable. Some inks will run already when trying to seal them! If so, don't despair, switch to laser prints on good paper and see the difference.
Remember you will need to seal the back, the front and the sides! We find it useful to lay the cut outs on a piece of plastic, something that is flexible and a little bit sturdy.
Repeat several times for inkjet inks, or a couple for laserjet inks. Wait until each layer is dry. This could be a day or so ...each! You have to ensure each step is completely dry, otherwise you could have problems later on - can't emphasise this enough!
Not quite ready - wait a bit longer!
Apply a drop of Diamond Glaze over the centre of the sealed image. Don't worry too much about bubbles at this stage.
Press the glass into the wet glaze. Pressing hard will make the bubbles pop out at the edge. You can use a heavy object to press down onto the glass whilst it is drying.
Over the following days, inspect your pieces and if they are completely dry, you can now glue them into your tray. If you have chosen to use any metal trays that are copper, brass or bronze or any antique/vintage platings you will need to coat your tray with a layer of ModPodge as Diamond Glaze has a tendency to react with these platings and turn blue which will give a distinct blue hue to your images.
Apply a drop of glue to the back of the pendant blank - we have used both Diamond Glaze and e6000 successfully here - the key is to ensure your image is well sealed and most glues that are suitable to stick paper to metal should be fine. If you use Diamond Glaze you need to watch that it doesn't wet the image too much, so use a drop or two and ensure the rest is completely dry before you apply it.
Once you press the glass into the tray you may get a bit oozing out of the sides, so wipe that away with a paper towel and once dry, wipe the glass with a damp cloth to remove any bits of dried Diamond Glaze (which is water soluble even when dry, so whilst this is handy as it will wipe away from the glass, it also means your work will be affected if the piece gets wet, so always advise your wearers not to wet the pieces).
We have used e6000 successfully to glue the glass into the pendant tray, with no effect to the image. Neither will you get any excess out of the sides if you use just enough. However one downside of using the e6000 is that it is very permanent so if you make a mistake you will not be able to re-do the piece, unlike with Diamond Glaze which can be resoaked so that you can start again.
As E6000 is stronger than Diamond Glaze, there is always a risk that it might pull the image away from the glass at points - the trick here is to apply a tiny line of E6000 around the edge of the tray instead of a blob in the middle. But generally if your paper is thick enough, and your work has been dry for some days, you don't need to be too careful.
When it has all dried, inspect your masterpieces....
Wear them with pride!
And because you will quite possibly have caught the bug, make more!
Enjoy!!!
(All images used in pendants & ring can be bought at Piddix, Printables and Digitalya.)
 Loading... Please wait...


